Fabrication & Repair Projects
DIY Thermal Camera with Teensy 3.6
A year or two after buying our house, I decided a thermal camera would be pretty handy for checking windows and finding air leaks. At the time, you could get the Melexis ML90640 sensor for pretty cheap ($40 ish) so I decided to make my own.
This prototype runs on a Teensy 3.6 microcontroller (Arduino) which processes the data from the sensor. I used a library from Melexis and also my own code to flip the image data and colorize it before outputting it to a LCD display. (ILI9341)
The handle contains a power booster board to supply 5v from a 3.7v source, an on/off switch, and a holder for a single Li-Ion 18650 cell. This was a really fun project and I’ve definitely reclaimed my initial investment both via entertainment and energy savings!
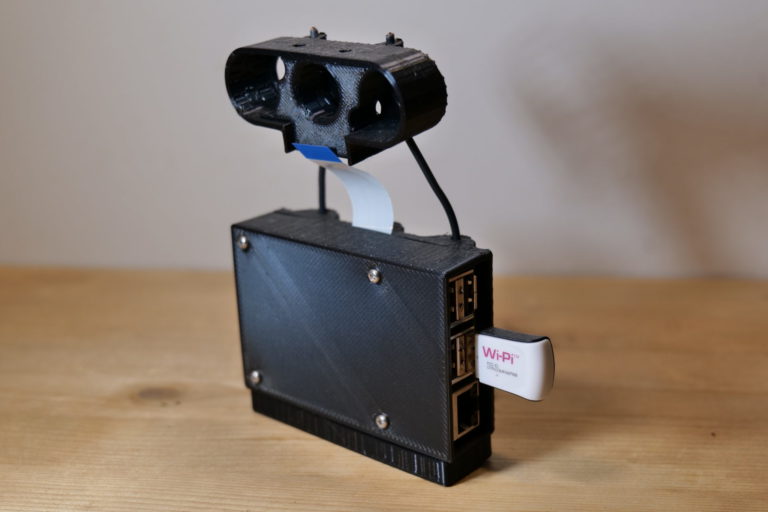
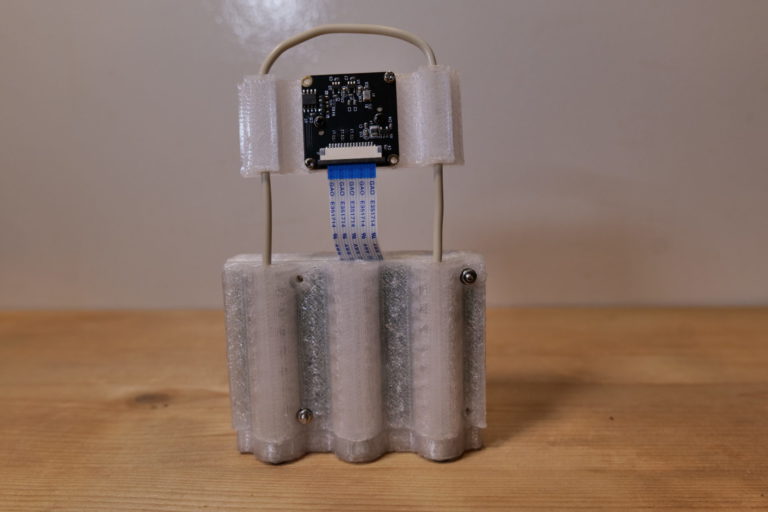
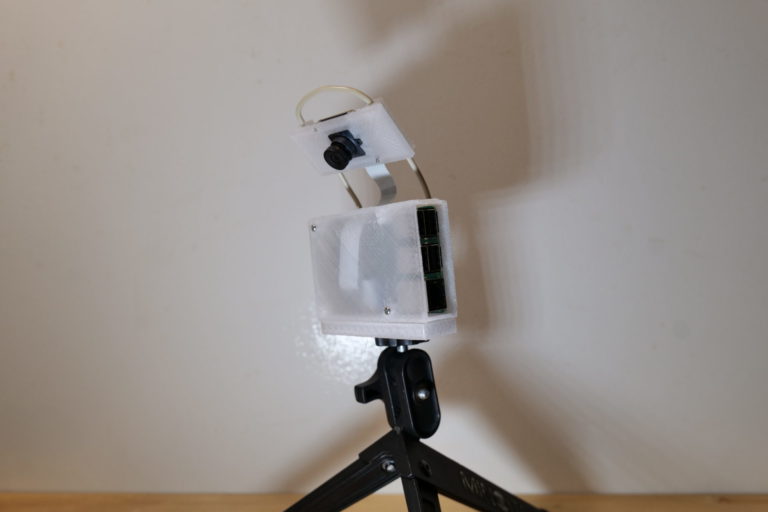
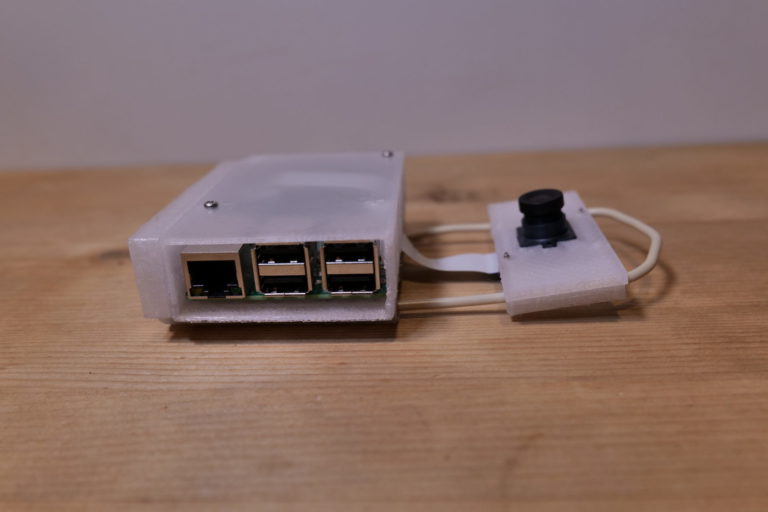
Raspi Cat Camera Housing
Sometimes you have to leave the cat(s) at home alone, and it’s at those times I feel it’s probably wise to have a way to monitor their sneaky feline activities.
This was the thinking behind my Raspi CatCam designs which serve three main functions:
1) provide a protective case for the board
2) provide a way to mount and aim the Raspi camera in a more precise manner
3) create a mounting point to attach the whole system to a tripod via standard 1/4-20 threaded attachment
The latest design uses the PiCam 3 library and an IR camera with a wide angle lens. Previous versions used a really great library called RPiCam along with an IR camera / light combo board.
The Luddite Fork Lift / Snow Plow
This is an upcycling/welding/3D printing project that serves as a way to move/drag heavy things (like logs) but also started out being a pretty good platform for a human-powered snowplow. It’s still a work in progress but it’s functional enough and fun to use!
Currently, it consists of a salvaged harbor freight bike rack, a home-made welded axle, some polypropylene grates (the plow), some old nordic track elliptical machine handles (“poles?”) and various other bits from various scrap objects. The only “new” components are the pneumatic tires which came from Harbor Freight.
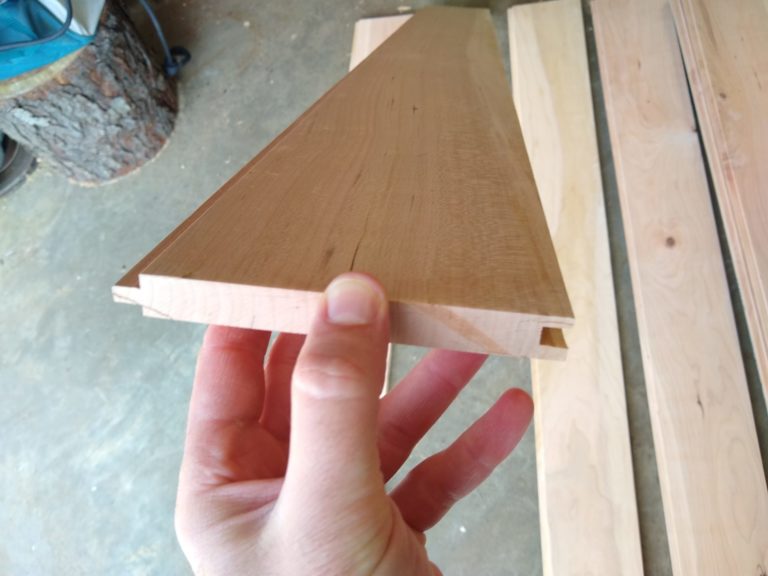
Bosch Router Plate for Making Tongue and Groove Wall Planks
I needed an easy way to center a 1/4″ straight router bit into the middle of a ~3/4″ plank but didn’t want to purchase a router table or other bulky accessories.
Using a dial caliper, I took the measurements from the stock router base and designed this centering jig which uses 3D printer type bearings (with plastic outer ring) which are easy on the wood as they roll along. I’ve used it for making tongue and groove planks from hemlock and black cherry and I’m really happy with how it works. It’s adjustable so that if the board thickness changes, I can just slide the bearings in or out in the slot, tighten the recessed bolts, and start routing again.
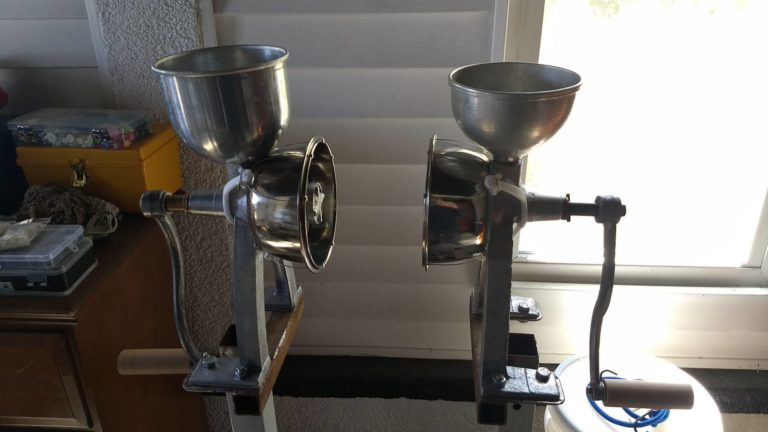
Retsel Grain Mill Enhancements
I have a few vintage manual-crank grain mills that I like to use for making various baking flours or cracking roasted barley (for brewing beer). Unfortunately, the standard design tends to send material all over the place as you operate the mill because there’s nothing to direct the flow or prevent ejection from the sides of the rotating discs.
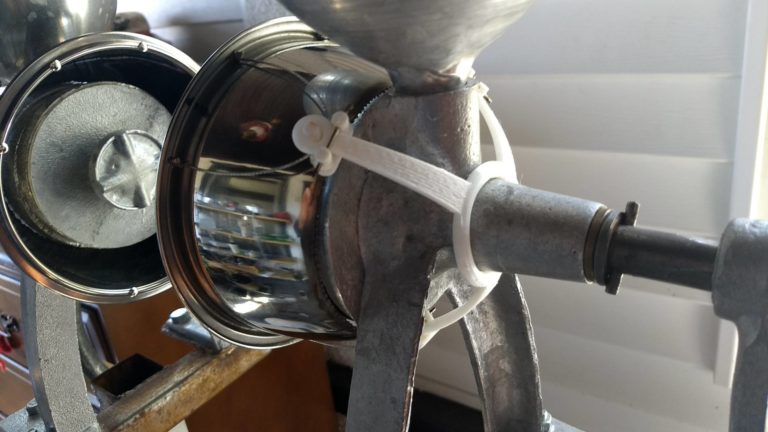
To improve this, I made a custom cone attachment from a cut stainless steel bowl, some stainless wire and some 3D printed parts of my own design. The mill is much cleaner to operate now and the output flows nicely into a bread pan or bowl placed underneath.
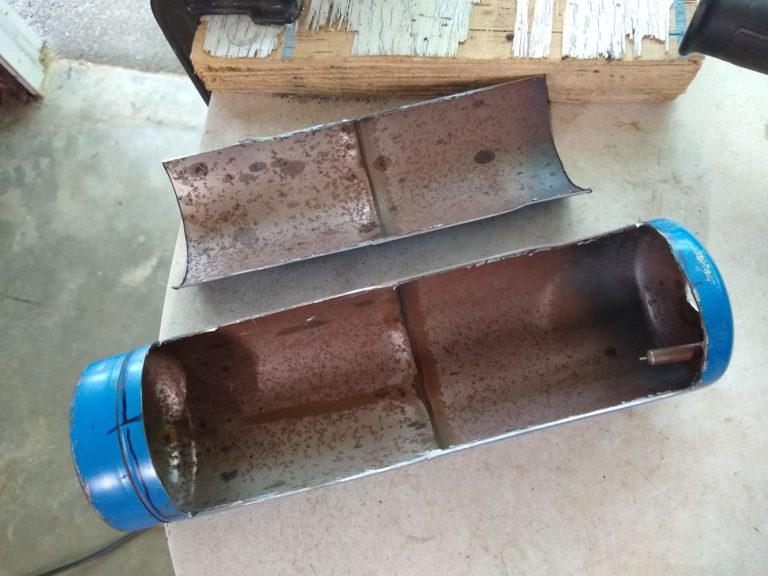
28 Oz Caulk Tube Holder from Propane Torch Tank
I had purchased a ‘sausage tube’ style caulking gun to apply some liquid membrane product for waterproof window flashing. However I really wanted (and needed) to be able to also run a 28 oz. tube of construction adhesive for certain projects. I decided that instead of purchasing an entirely different caulking gun I could just make a new ‘tube adapter’ out of a used propane cylinder. It was good welding practice and the end product does the job and looks pretty sleek!
3D-Printed Trail Markers
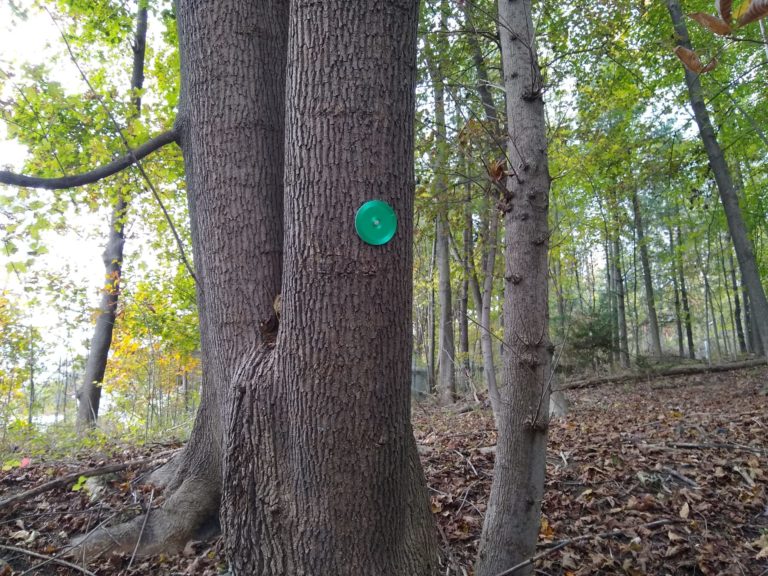
I volunteer at a local nature preserve and they were in the process of remarking trails and updating maps. Unfortunately they had run out of green trail markers. I ordered some ‘Jade’ PLA filament and after some trial and error I developed a technique to print some pretty decent trail markers with a 0.8mm nozzle and concentric infill.
Mop Repair
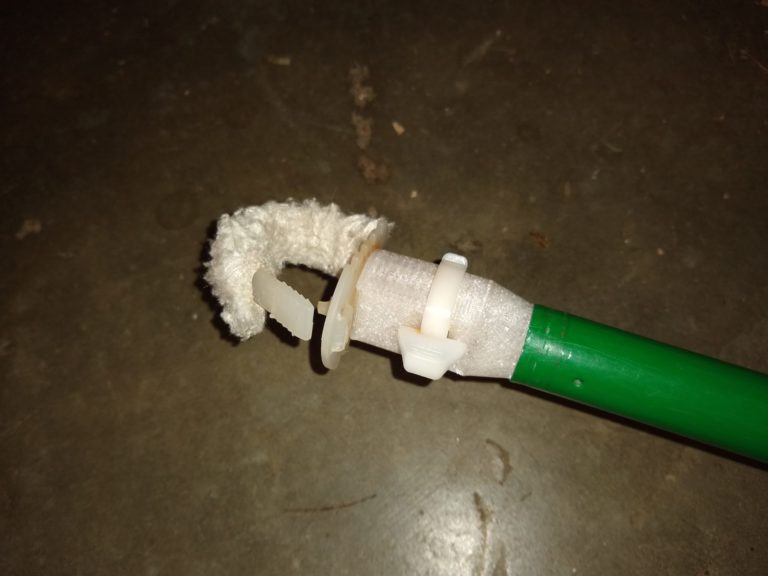
Our handy ‘tornado’ mop had succumbed to moisture and rust. It doesn’t take much to rust out because the handle (metal tube) is very thin walled. I decided to repair it with my own designed and printed 3D repair coupling. The new part is PETG plastic and will probably add quite some years to the lifespan of the mop!
Cybertree
When Tesla announced the CyberTruck in November 2019 I thought it would be funny to try and make a ‘CyberTree’ just for fun. I used a 1 watt common-anode RGB LED from Adafruit along with a DIY transistor circuit board, an Adafruit GEMMA (arduino), a motor and some 3D printed parts to cobble together a fun (but rather noisy) LED light show inside a 3D printed translucent PETG ‘tree’ of my own pointy and boxy design.
My idea was that a motor with small gear would turn a larger geared ‘ring’ of sorts. On top of the ring would be a dome with various patterns cut into it, allowing light from the RGB LED to pass through and make neat visual effects on the translucent tree body. It worked pretty well but due to the noise and trouble with the motor drive, I ended up running out of time before Christmas that year. (It was meant to stand in for our Christmas tree, more or less)
In the future, I hope to improve on this prototype by using a quiet stepper motor which would probably allow me more control over the speed of the spinning dome.
The CyberTree in action! (Short video – click it to play)
Phone / Display Mount for DJI Drone Controller
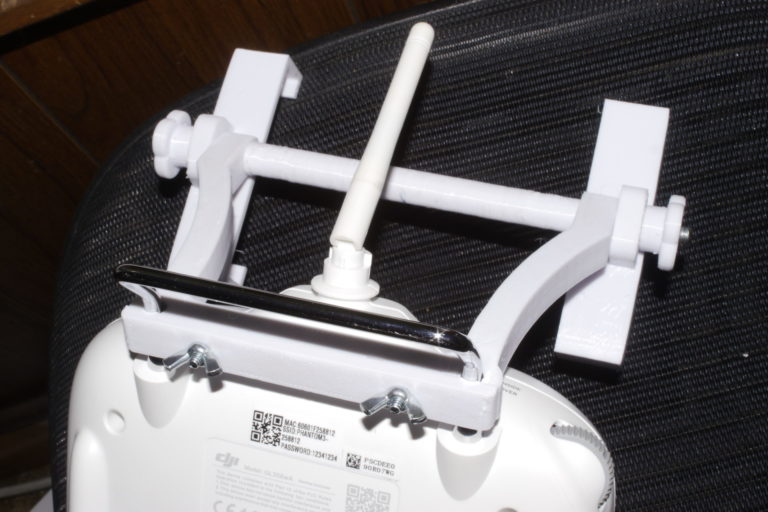
The original phone attachment for the DJI Phantom 3 left much to be desired. It was basically a single flimsy arm with a plastic ball joint. I felt that it was only a matter of time before the weight of a large smartphone would cause the fragile plastic to snap in various ways.
I designed and printed a more stable PETG system to hold the phone and attach to the controller at two points instead of one.
Homemade Hole Saws for Soft or Thin Materials
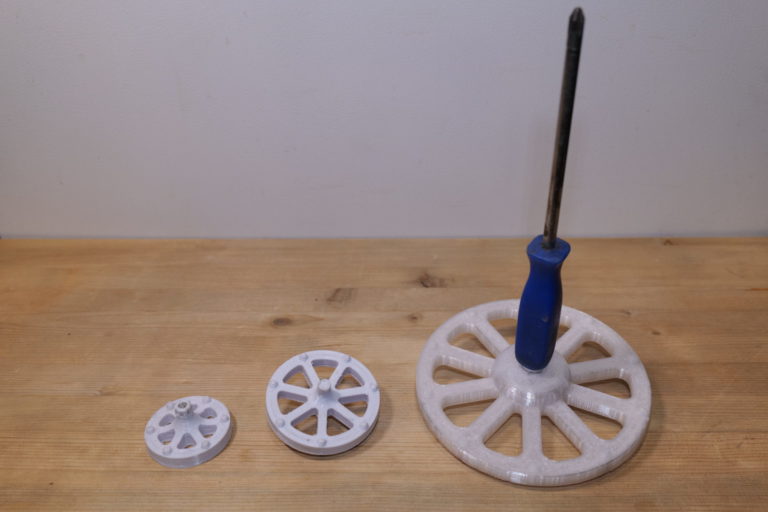
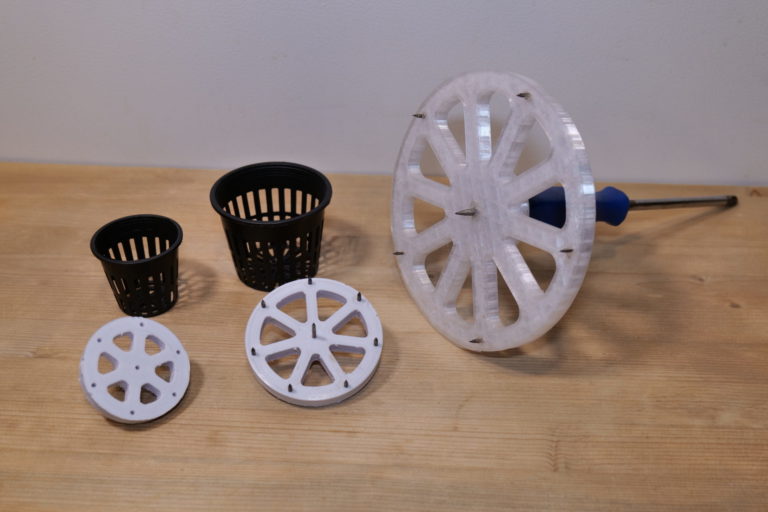
I needed a hole saw for a few jobs but didn’t really want to invest in a proper one, so I figured out how to make my own light-duty one with a 3D printer and some TIG welding rod.
I modeled a sort of ‘wagon wheel’ design with pockets to accommodate short lengths of sharpened TIG welding rod. When used in conjunction with a 1/2″ chuck drill motor, this can easily cut through 1/8″ polypropylene plastic or thin wood panelling.
The largest saw pictured cuts a 6″ diameter hole for installing recessed LED lighting. Luckily I had a hex-drive screwdriver (the head can be turned with a socket wrench) so I was able to use that as the drive shaft on the 6″ saw.
The Vesparator - A Light Duty Respirator
Sometimes you just need a good quality, comfortable, homemade face mask to protect your respiratory system from things like viruses or dusty particulate matter.
I designed this 3D printed face mask around the concept that you could replace just the small filter patches (of which there are 4) instead of throwing the whole thing away. The filter patches are cut from N95 ‘Filti-Fabric’ which is a commercial product designed to be used in this type of application.
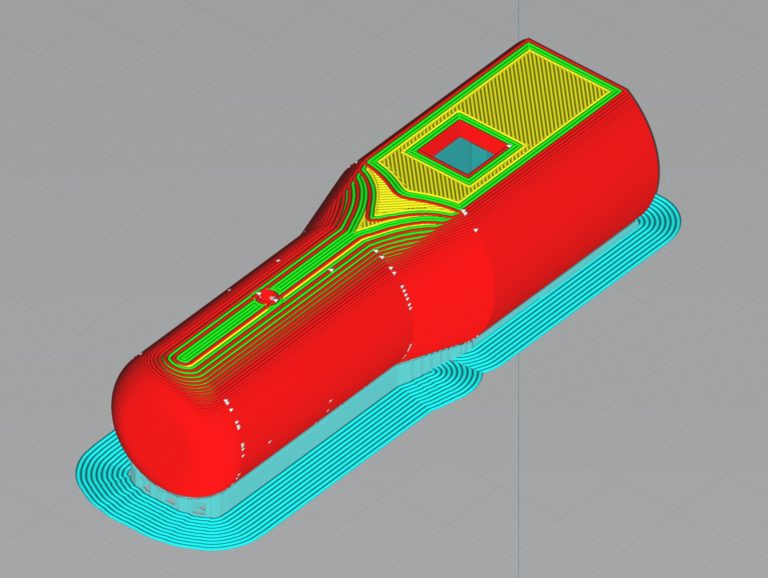
The outer shell of the mask is printed in ‘vase’ mode so that there are no gaps or holes in the surface. This portion of the project took a lot of trial & error and testing to ensure that the surface was air sealed.
The silicone gasket is created from a 2 part skin-safe silicone (from Reynolds Advanced Materials). This material is mixed and then poured into the gasket mold (see bottom right of first photo in the series).
The head strap is attached the the mask via short lengths of poly-rope which pass through metal grommets for reinforcement. The head strap design also utilizes some 3D printed “splitters” and shock cord to allow for a nice comfy fit.
‘The Vesparator’ name was inspired by our dearly departed cat whose name was ‘Vespa’.
Resin-Printed Mortar and Up-Cycled Pestle
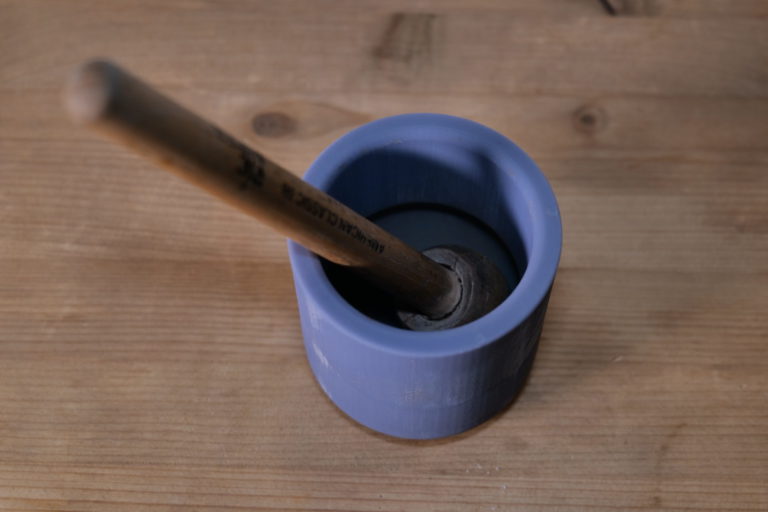
I wanted a sort of ‘grungy’ mortar and pestle that I could use in the garage to grind up Shellac flakes (used in woodworking to create a natural wood finish).
I designed the mortar in Fusion 360 and then printed it using Anycubic ‘Eco Resin’ which is a more environmentally friendly UV resin made partially from soybean oil. I went through a few design versions, eventually making the mortar deeper to prevent material from escaping the bowl too readily.
The pestle is created from an old Vic Firth drum stick and the cap of a Cholula hot sauce bottle.
House of Almonds Bluetooth Radio
It seems like this wireless portable radio has components from all over the place.
First, the outer wooden box was a thrift store find; a House of Almonds gift box of some sort. The speakers were salvaged from an iHome radio, while the amplifier is an off-the-shelf item from MCM Electronics. However, the amp was removed from its original housing and refactored to fit into the wooden box in such a way that the combination volume knob / power switch is easily accessible.
The power source is a 3.7v 18650 cell which feeds into a boost circuit, increasing the voltage to the required 12v that the amp needs. Meanwhile the bluetooth module takes its power directly from the 3.7v cell by tapping into the boost circuit supply voltage pads.
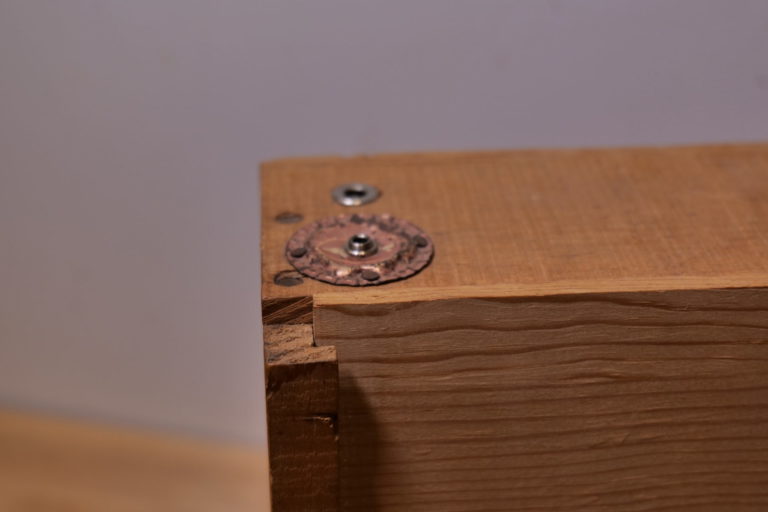
The colorful 1/8″ stereo cable was hand-made from salvaged telephone wire and the finishing touch is definitely the Dogfishhead beer bottle cap nailed in as a mounting plate for the 1/8 jack input. (If the user prefers to use audio cable instead of bluetooth, that’s an option). The amp can also be powered from a 12v supply via barrel jack on top.
Did I mention it sounds really good?
IR LED Light from Printed, Salvaged and Shelf Components
I wanted to make something modular to house a voltage and current-limiting board. I’ve been enjoying tinkering with driving various LEDs from these boards but I thought it would be nice to have a design that would be rugged but also allow different components to be swapped out without much redesign.
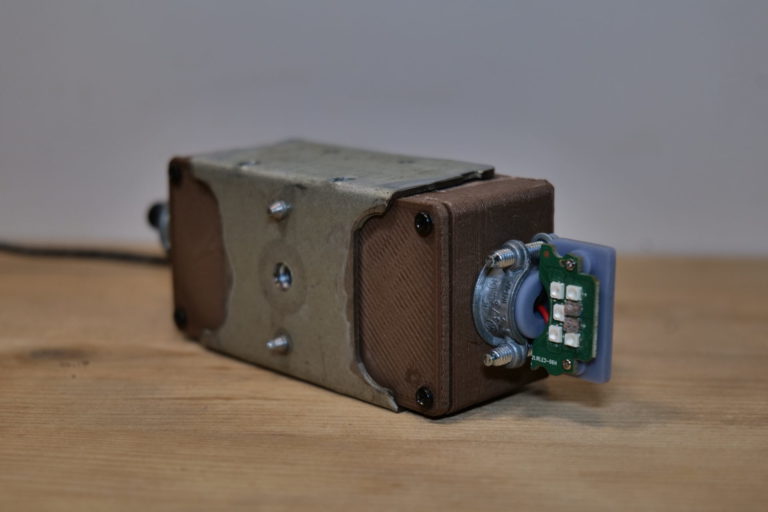
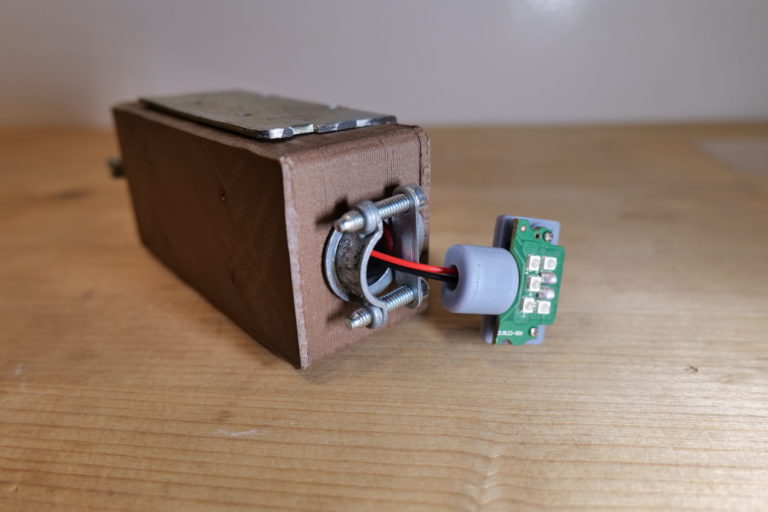
I ended up using an old metal junction box as a starting point and then 3D printed a wood PLA box with raised bosses to mount the buck converter (V/A limiting) board inside.
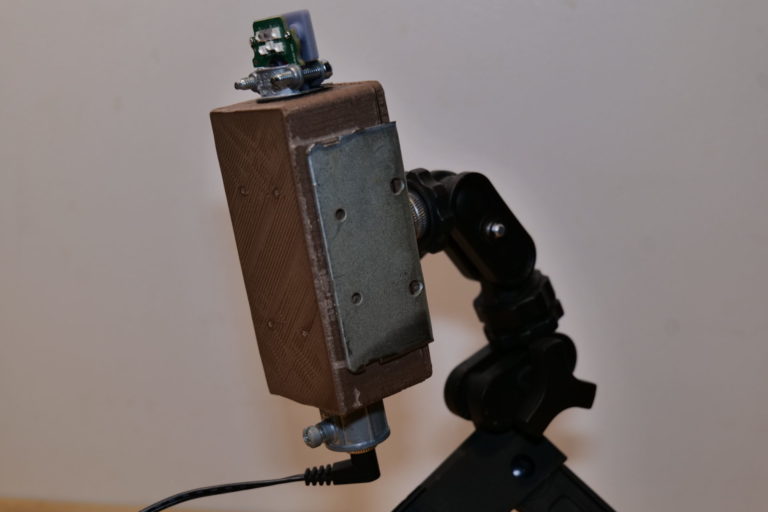
The ends are designed to work with off-the-shelf NMSC (romex) clamps and 1/2 EMT tube couplers. I also resin-printed a special barrel jack adapter and clamp adapter. The barrel jack allows for power supply from a typical 12v adapter while the clamp side is depicted holding an infrared LED module salvaged from discarded wireless security camera.
The metal jacket provides nice protection and also helps secure the captured 1/4-20 nut which can be used to mount the device on a tripod or other fixture.
The Infinite Time Lapse Machine
I don’t think it would really run for all eternity, but this modified SONY Action Camera with custom 3D printed housing and 110v AC to ~3.7v DC power supply does run for quite some time. (Until the memory card is full at least!)
I’ve tested this up to 44 consecutive days capturing one frame per 60 seconds (timelapse) of an eggplant life cycle from flower to fruit.
I’m especially proud of my camera housing design which lets you attach to the camera case on either top or bottom via a 1/4-20 tripod screw. In my opinion this design is much more versatile than the original housing that came with the camera.
The dummy battery was fashioned from scraps of one of the original Li-Ion camera batteries that no longer held a charge. Inside the metal case are some custom copper tabs and resin-printed plate to align everything perfectly to the camera power contacts.
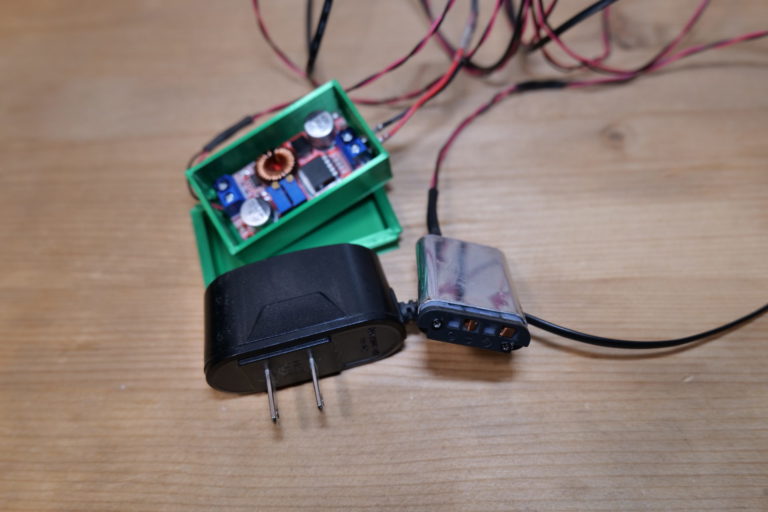
The power supply box is drawing power from an old motorola 5v phone charger which is voltage regulated down to ~3.7 volts (which is the original camera battery voltage).
44 Day Timelapse Captured with the Modified SONY and the IR LED Light Box
(Click the video below to play)
Heavy-Duty Scale Project
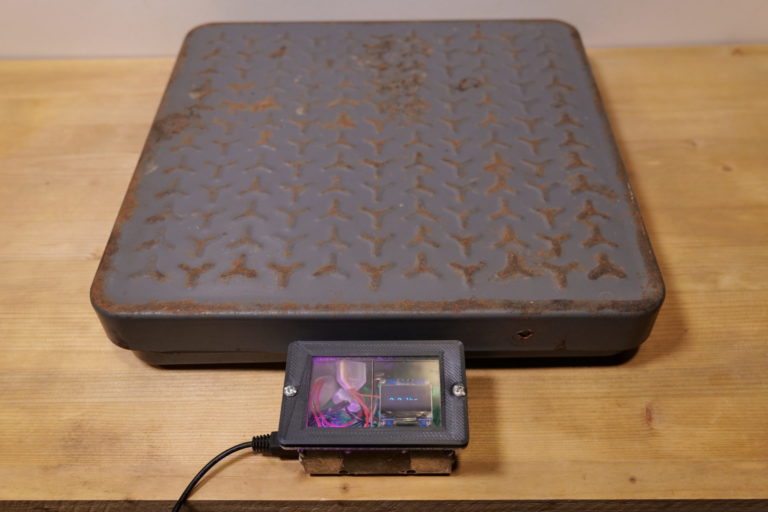
A few years ago one of my family members “gifted” me an old heavy duty steel scale, like the kind you might use to weigh bushels of apples (or random piles of rocks).
The steel housing was really well made, but sadly the electronics seemed to be erratic / unpredictable and not worth repairing (and possibly beyond my skill level).
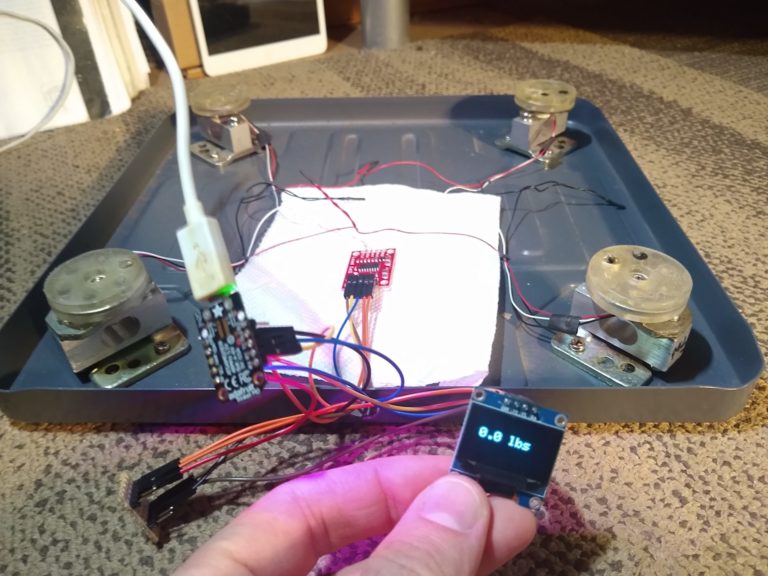
I decided to attempt repair by using the original load cells (strain gauges) coupled with a new and fairly inexpensive load cell board from SparkFun. I also decided to use a cheap OLED display and program it all onto an Adafruit Trinket M0 board.
I designed and 3D printed various plates to hold the electronics (the load cell board, the display and the microprocessor). The display and Trinket M0 are housed inside a salvaged metal junction box with clear acrylic faceplate and 3d printed bezel. I also made some strange little 3D printed ‘bottles’ inside which some wire splices are held.
It was a really fun project and the end result seems to work great and be quite accurate. I power everything from a standard 5V USB power supply, but I’m sure it would easily run from a 5V battery setup, making it much more portable if needed.


